
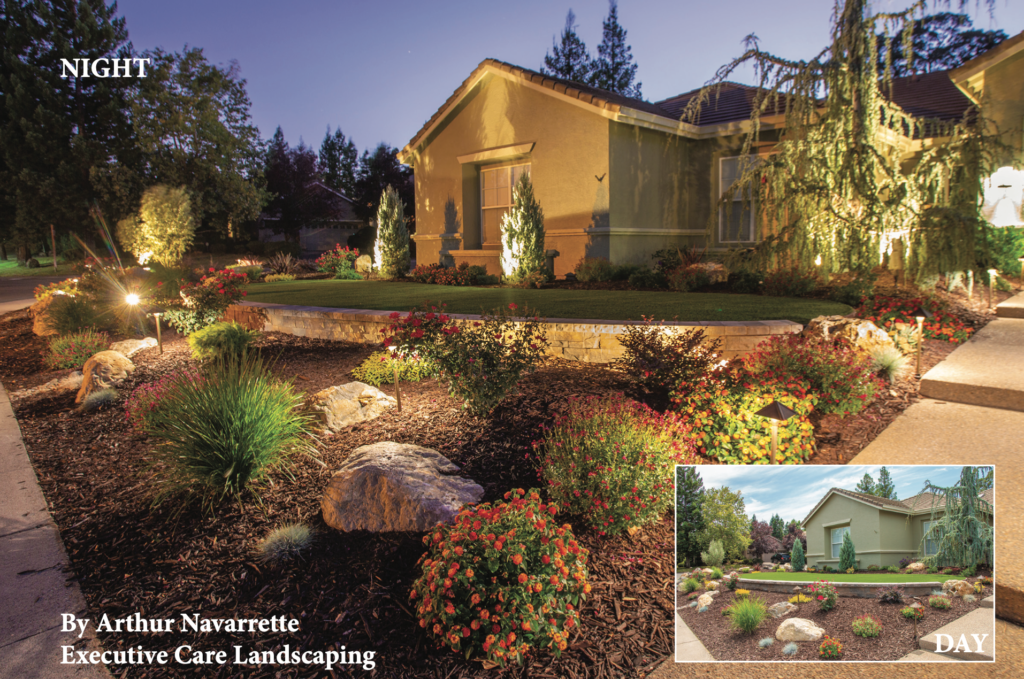
Welcome to our October issue. I cannot tell you what a difference night lighting makes to the completion of a landscape. It takes it from super cool to excelente! (excellent in English) It adds a whole different mood, a certain romance, and gives one a relatable feeling. I have had night lights forever in my yard and when I step outside into the evening, I still get the same feeling I got 15 years ago. When night lights are done correct- ly, they are beautiful, and if you are into entertaining, night lights are a must. They can be costly if the budget is tight, but you can buy them inex- pensively. So, let’s talk lights.
There are three basic types of materials that light fixtures are made from and in general there are two types of lights, spotlights and path lights. There is plastic, which obviously is the least expensive and the first to burn out. Their overall appearance is really lacking, but they do produce light. You will need to use more to get the same effect as other lights, and you will want to upgrade in three to five years. There are also aluminum lights. They look much nicer than plastic. However, the color is powder coated to the aluminum, and after about three years they fade, which makes them look old. Aluminum lighting hardware is far superior to the plastic light hardware. The only downside is they are only about $20 to $30 dollars less expensive than the top of the line lighting. In my opinion, brass lighting is the top of the line. The Brass looks high end and it is affordable ($92 – $ 115 depending upon the fixture). These are the ones we prefer to use.
There are other lights made from titanium and they are used more for a modern look. Titanium lighting is pricey, ranging between $150- $200 per light. If the look of dark brass is not a concern then there are fixtures that have a modern look to them, so there is a potential for savings. The brass lighting will patina as all natural metal does in the sun. The cost for spotlights in particular is determined by the distance that the light needs to travel. If twenty feet is the distance, then most average spotlights fit that.
However, if we need to light up a large tree, such as a Redwood tree or mature Oak then a larger size spotlight will be needed. It will cost slightly less than $150. To me lighting is worth the investment because it brings such a huge change to the yard, and the upside is it doesn’t have to be done at the time of the landscape installation. We can always prewire and install the lights later.
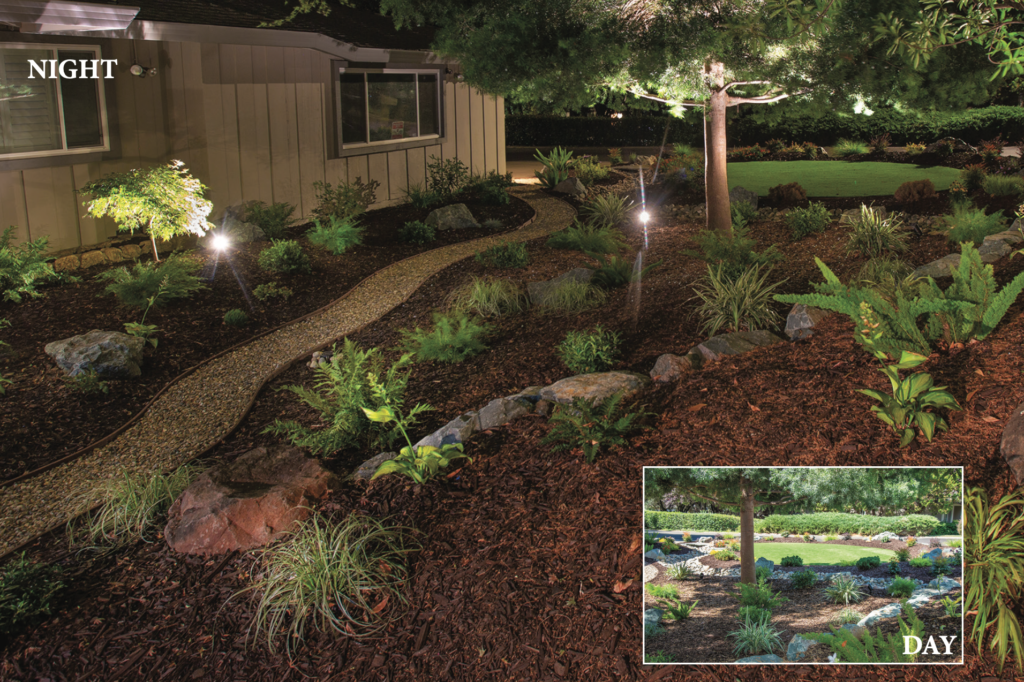
Once we decide on the type of lights we are going to use, we then have to decide what we want to light up. Spotlights are often called “up lights” due to the fact that they light upward. Aside from trees, they can be used to light up block walls by “splashing or di- recting” the light sideways so it travels across the face of the wall. This method saves money. We can also use wall lights which I really like, but you will need to use more to get the same effect. Anoth- er similar lighting fashion is lighting up a stream bed by shooting the light up through it. We must be careful to not direct the light into people’s eyes that may be walking by or into the neigh- bor’s home. Path lights are the opposite of spotlights.
Path lights do what the name implies, they light up the path. The path can be the sidewalk leading to the front door, or a flagstone pathway lead- ing into the landscape or around the house. I sometimes use them around boulders in the landscape or alongside a dry stream bed. It’s a very nice look. It takes about three to four path lights to light up a stream bed compared to one spotlight, but I prefer this look be- cause the light is more controlled. It gives you the freedom to create little scenes with the light as opposed to taking a shotgun approach with a spotlight and lighting up everything. Doing some form of lighting for the stream bed is way better than doing nothing at all. Remember with lighting, darkness is your friend. You have to have the darkness for the contrast so what you are lighting pops.
So, once we have decided what to light and what type to use, the next step is the set up. The setup is harder to explain and a video clip would do a better job of explaining so you could see step by step. I will however give you some tips. Spend money on wire nuts, and do not buy cheap ones. The greatest failure point for lights is the wire nuts. Moisture gets into the wire nut and shorts out the light. That is why I do not like the plastic lights. Their connection points are not moisture proof. When one light bulb goes out do not wait too long to replace it. We are now using LED, as op- posed to old school halogen, and the LED bulb does not require a lot of watts. So as light bulbs burn out, the wattage increases in the line and a heating up effect of the other bulbs begins to occur. Before long they all start burning out because of overload. Also, most jobs can be completed with 12-2-gauge wire. The days of using 10-2 are mostly gone unless you are going quite a distance. With LED lighting, the “daisy chain” method or one light after another as opposed to the “T” method that we used to use with halogen is acceptable. A transformer of 150 watts now is also acceptable as opposed to the 300 watts we used to buy. Most come with a photocell built in, which you will want. The lights go on by themselves as evening comes, and you only need to program when they turn off. The whole field has changed with the advent of LED lighting. Finally, always chose a warm white LED bulb as opposed to cool, it works better in the landscape colors.
Next month will be our final article on landscape and if there is a topic you would like me to cover, just let me know. My email is arthur@executivecareinc.com. In December I write the hardest article for me because it is somewhat personal and deals with us as people. I have been very blessed to meet so many of you this year. We are doing three landscape jobs at any given time and the aver- age time is 2 to 3 weeks per job, so I have the privilege to talk and get to know quite a number of clients.
Gardeners – you should have or be close to planting your winter garden. The winter garden is my favorite. We plant spinach, lettuce, kale, broccoli, cauliflower and even carrots. Carrots are usually planted early spring. These are what we can grow in the cooler months. Add a cold frame and they turn out even that much better. Until Next Time—Good Gardening.